Workflow Designer
Contents
Helios has a comprehensive and flexible capability to provide workflow and electronic routing for your forms and documents. Forms can be designed and created in Helios easily and incorporated into workflows. Workflow routing and approval paths can be based on complex criteria for reviewing and approval by various steps and people involved.
This document is focused on workflow management. Although we will touch on form integration to workflows, the design and development of forms is in the Forms Management documentation.
Creating New Workflows
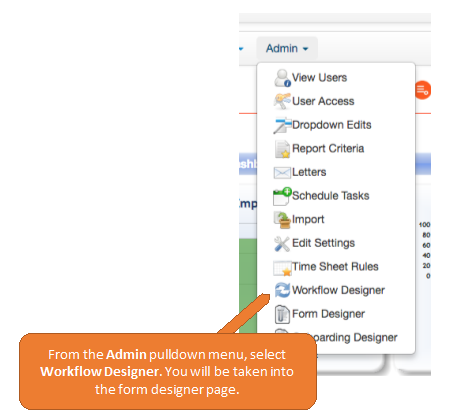
You will be taken to the Design Workflow page. We will be creating a new workflow.
Design Workflows
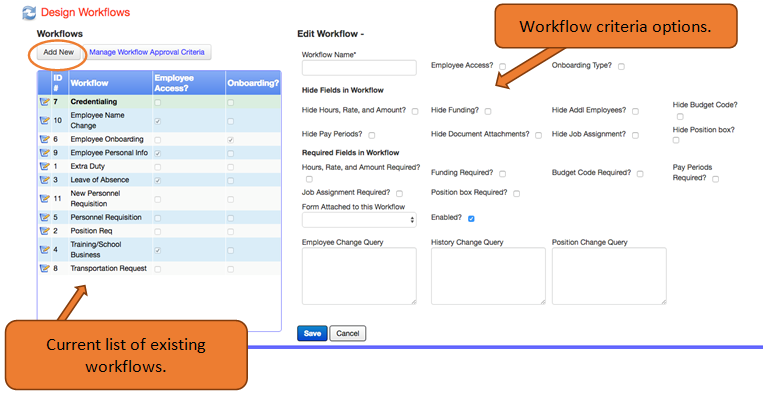
In our example, we will assume most forms have been created for the workflow.
To add a new workflow, you must the Workflow Name to start creating it. You can enter the workflow criteria now, or, come back later and edit the workflow. For our example we will be creating a volunteer registration workflow.
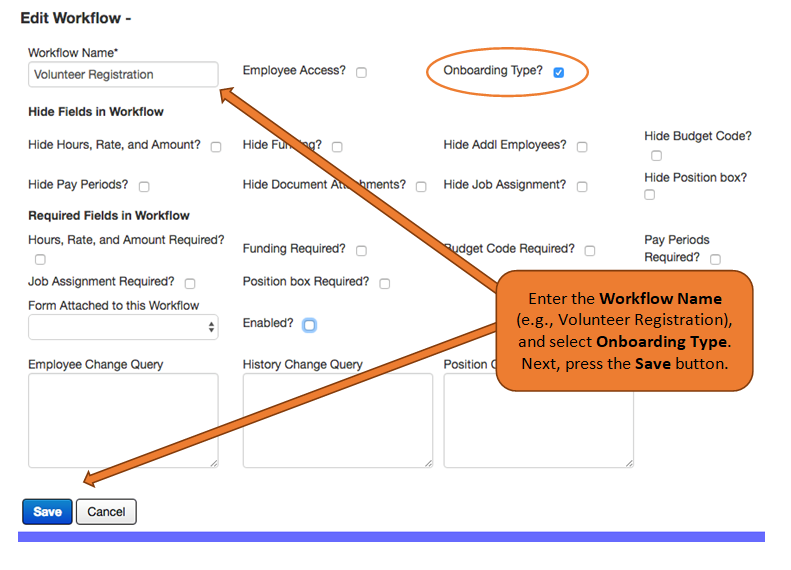
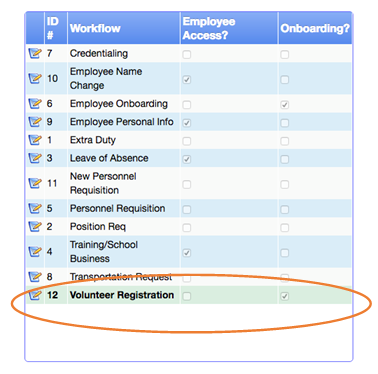
Once you have pressed the Save button your new workflow will appear in the list, and the highlighted bar, shown in green, indicates the Volunteer Workflow is selected and is the one you are working on.
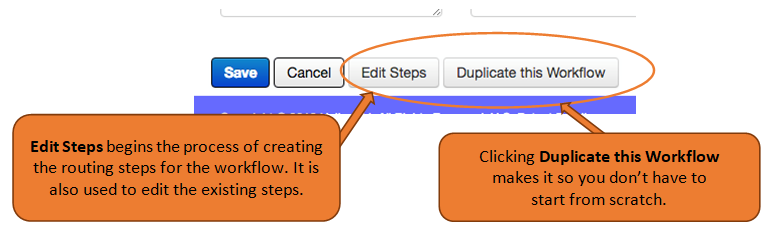
You will also notice two new buttons on the bottom of the Edit Workflow section. These options will be shown later in the documentation.
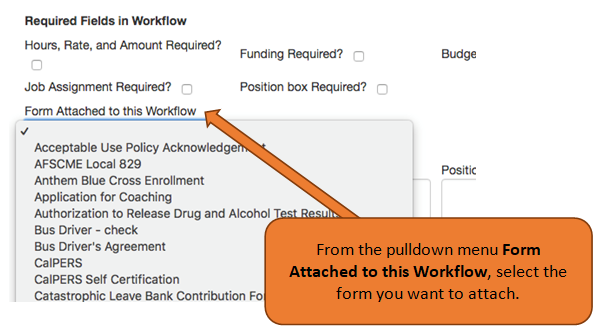
Each workflow has built-in fields besides the custom form you create. You can choose to hide or require these fields in the workflow. All you need to do is to click the box next to the information you either want to hide or require. Before we move on to next section, here are the definitions of the fields in the Edit Workflow section:
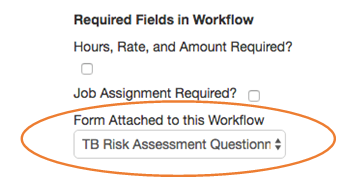
In our example, we have attached a TB Risk assessment form.
You would select whatever form you just created.
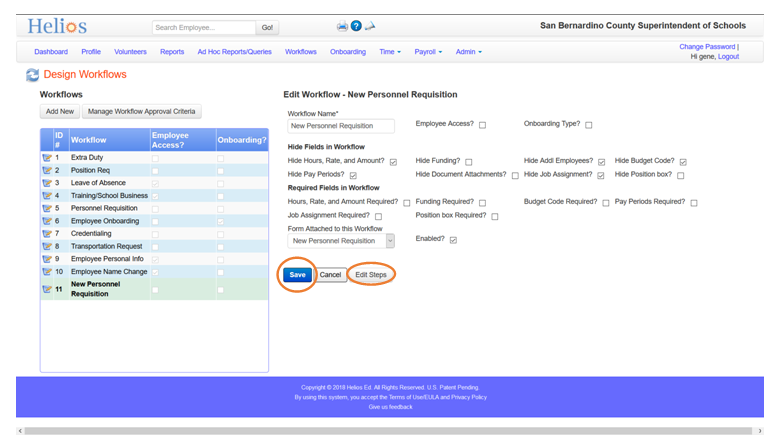
Finally, click Save button to save the workflow. Once saved, click on the Edit Steps button next to it to build the routing steps.
Edit Steps
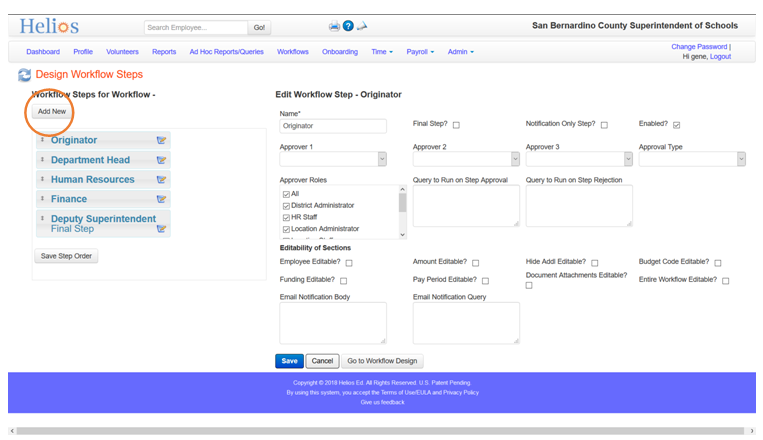
Click Add New button to add steps. Enter details for each step including Name. For the final step, check the Final Step checkbox. Select the approver(s) roles for this step.
Under Editability of Sections, you can check which sections in the workflow will be editable at this step to allow the reviewers of that step to make changes before approving.
Click the Save button to save the step.
You will see the steps added to the left. You can change the order or sequence of the steps by dragging and dropping them in the list of steps. Be sure to click the Save Step Order button to save changes.
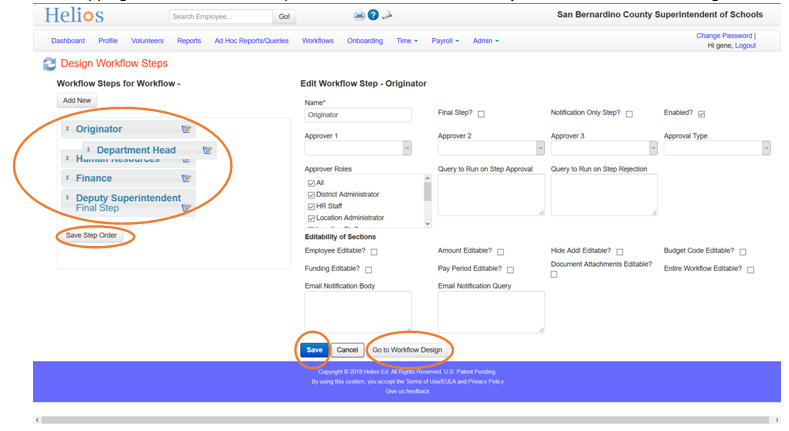
To define the criteria based on which workflows can be routed to different approvers, click Go to Workflow Design. Then click on the Manage Workflow Approval Criteria button.
Manage Workflow Approval Criteria
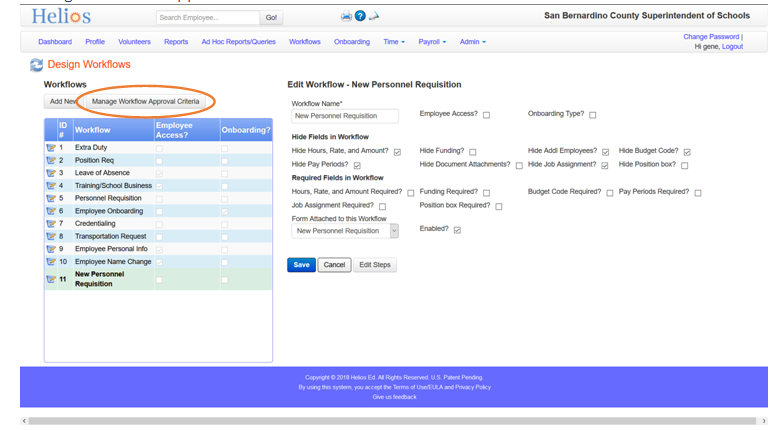
In the Design Workflow Approvals page, you can create different approval criteria based on variables to include or exclude who will approve the workflow.
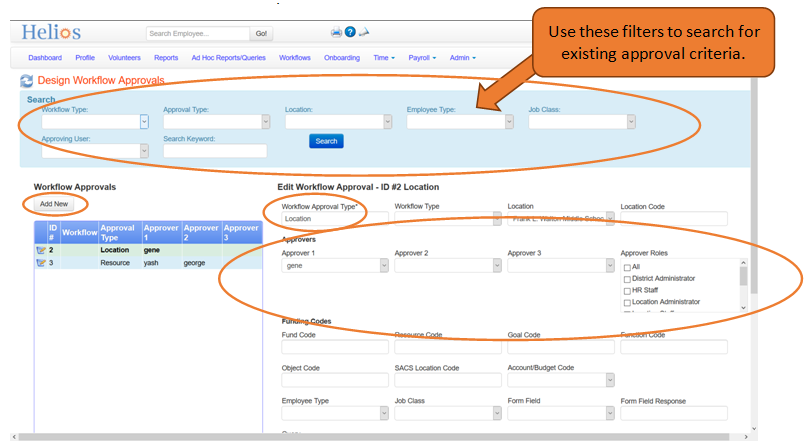
Click the Add New button to add a new approval criterion. Enter the fields on the right including the Workflow Approval Type .
Workflow Approval Type
The Workflow Approval Type is a free-form text field, but be deliberate about what you type here, because this would be one of the words or phrases that will appear in the Edit Workflow Step Approval Type drop-down menu.
Approvers or Approver Roles
Select the approvers for this criteria in Approver 1, Approver 2, and Approver 3 dropdowns. Or you can select the Approver Roles who will approve. The approvers you select here will be Approver 1 or Approver 2 or Approver 3.
Additional Criteria
You can fill in the criteria for this approval step and leave the others that do not apply blank. All the criteria you select will be used (it's this criterion and this other criterion, not this criterion or this other criterion).
Helios has built in SACS codes and other fields, and you can set funding codes, budget codes, employee types, job classifications, and user responses on the form as criteria for the approval.
Click the Save button to save the criteria. You can continue adding more based on your needs.