
Time Reporting Combined
Going to Time Reporting Combined
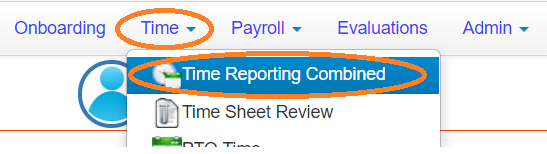
Once you're logged into Helios, click on Time, and then select Time Reporting Combined.
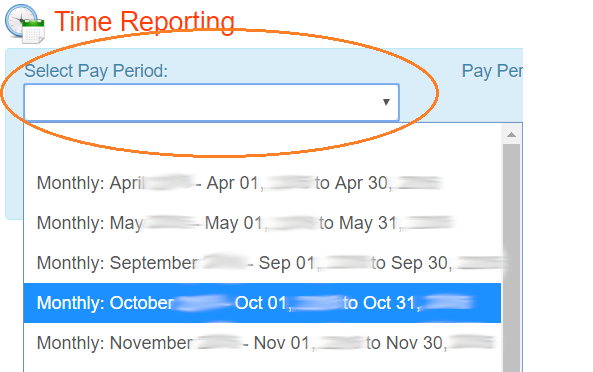
A new browser window will appear.
From the Select Pay Period drop-down, select the pay period you want to view.
Editing Employee Timesheets
To edit an employee's timesheet, click the edit button (pencil on a notepad) next to the employee's name.
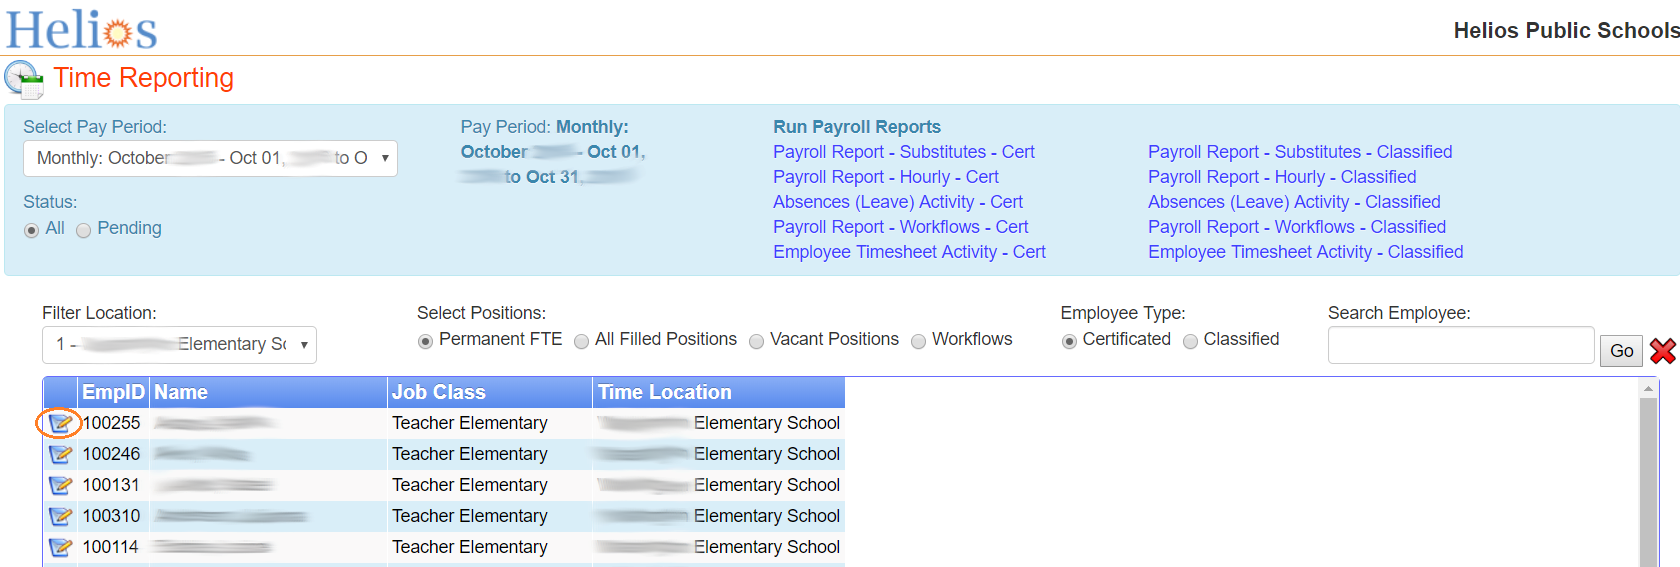
If you aren't seeing the employee you want for that time period, you can select from the Filter Location drop-down menu, pick the appropriate radio button from Select Positions, pick the appropriate radio button for Employee Type, or search by employee name in the Search Employee search box.
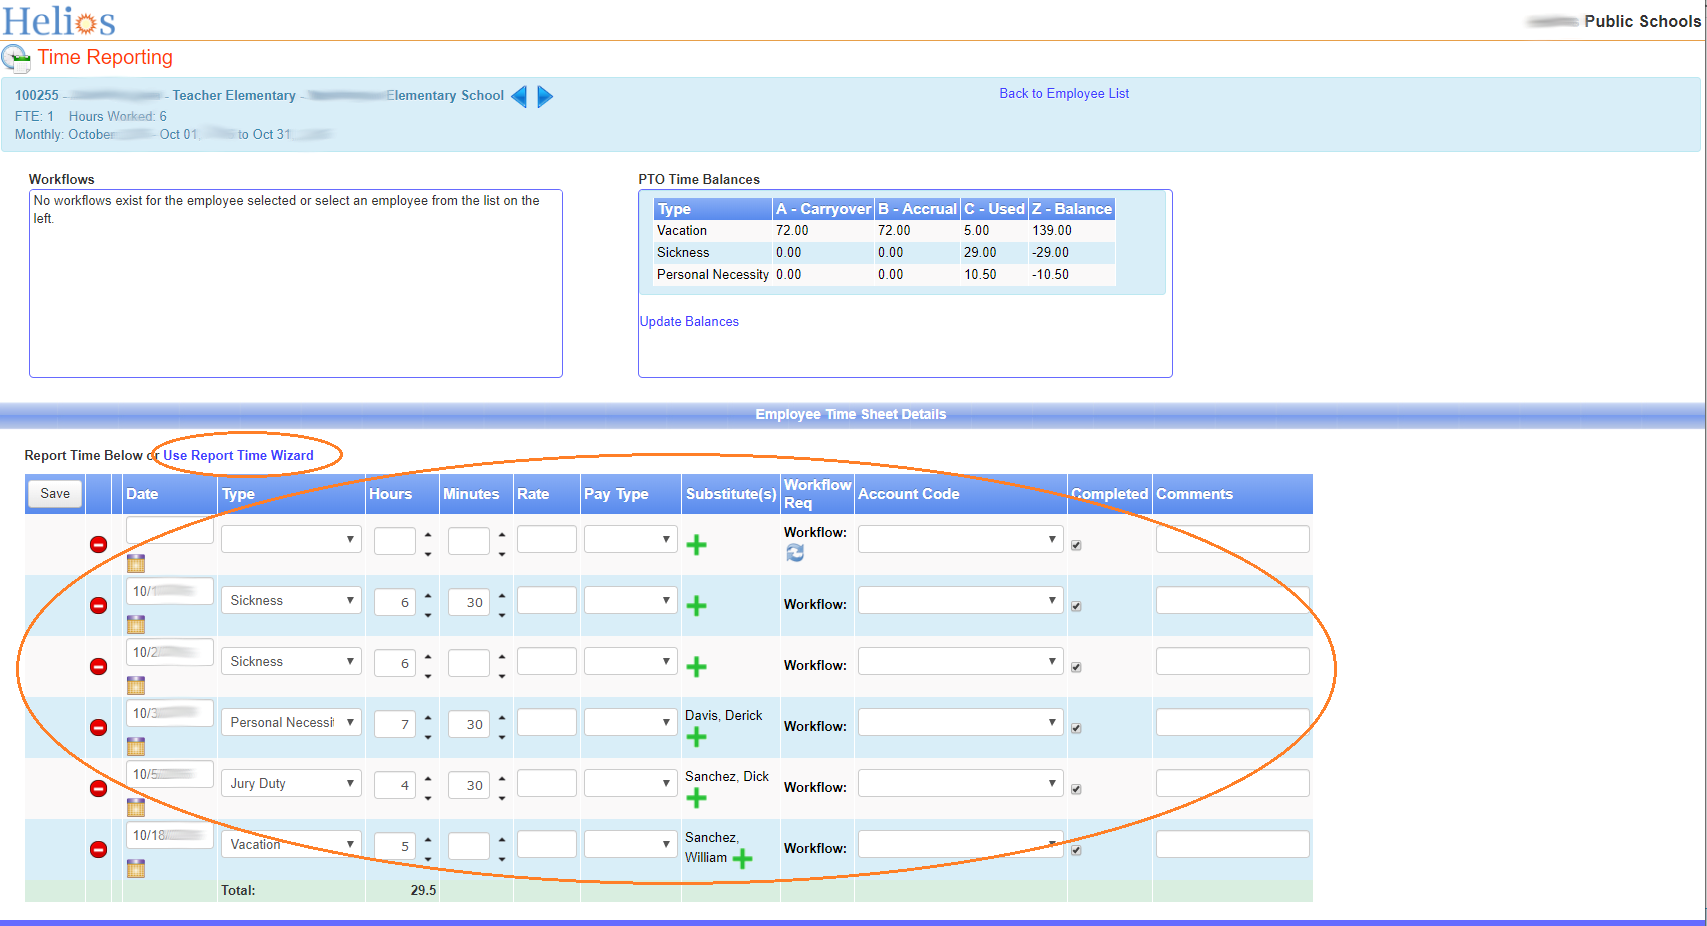
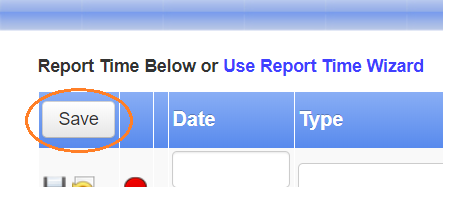
You will then see time sheet details for that employee. If you want to update the timesheet, it's probably easiest to do so inline, but there is also an option to Use Report Time Wizard.
If you do choose to use the Report Time Wizard, a new dialogue window will appear. Once you're done filling this first window out, click Next.
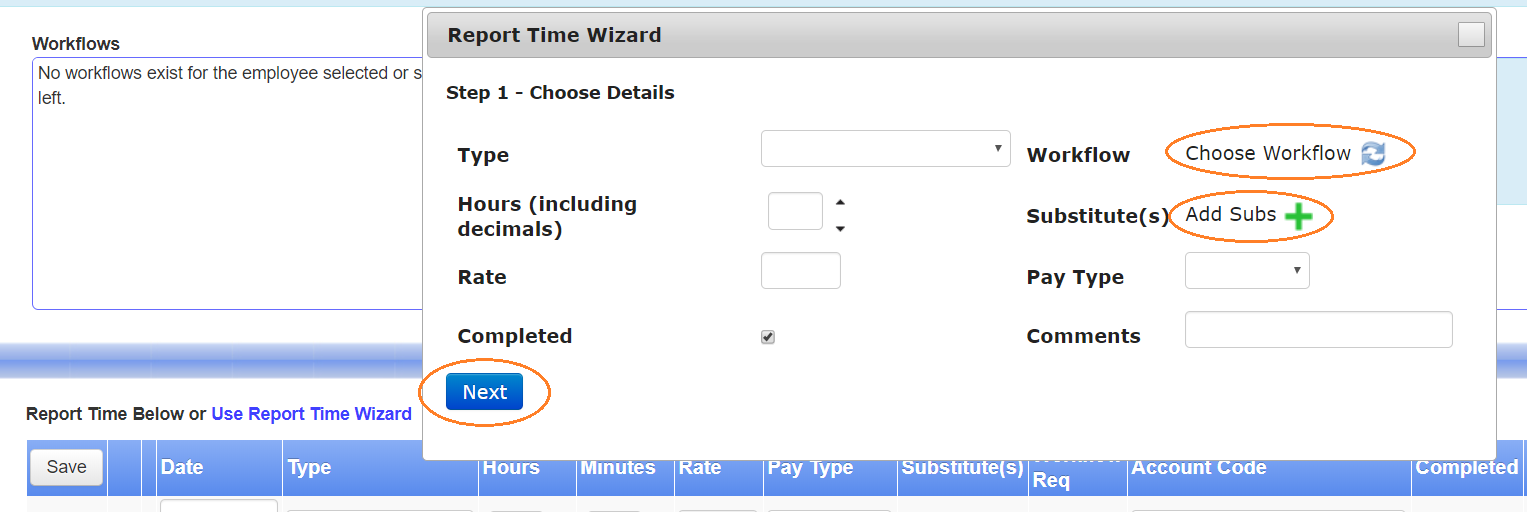
You can also click on Choose Workflow to choose a workflow or Add Subs to add a sub. In both cases, a small dialogue will appear.
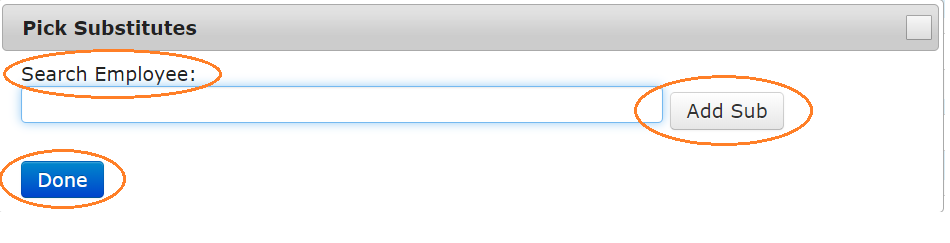
For the Pick Substitutes dialogue, you can just start searching for an employee, and then, once the employee is found, click Add Sub to add the sub.
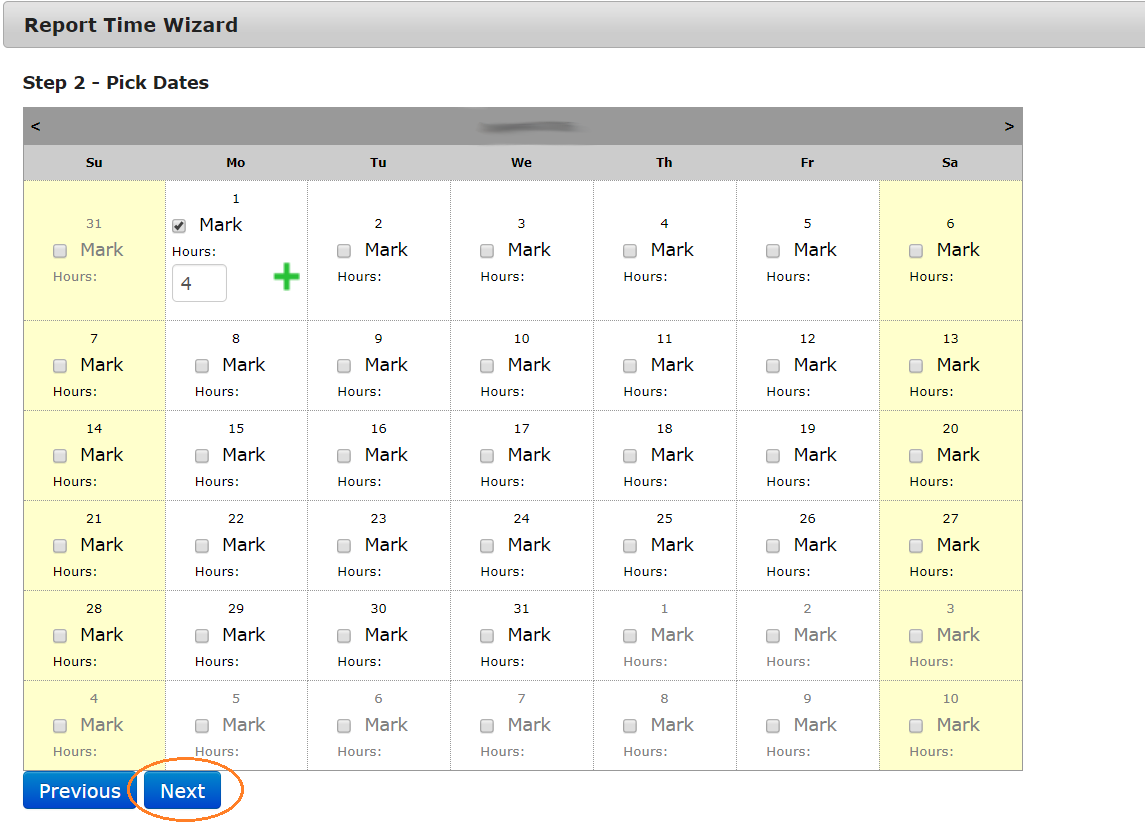
Then you can mark a date or dates, and click Next again (or click Previous to go back to the previous Report Time Wizard step).
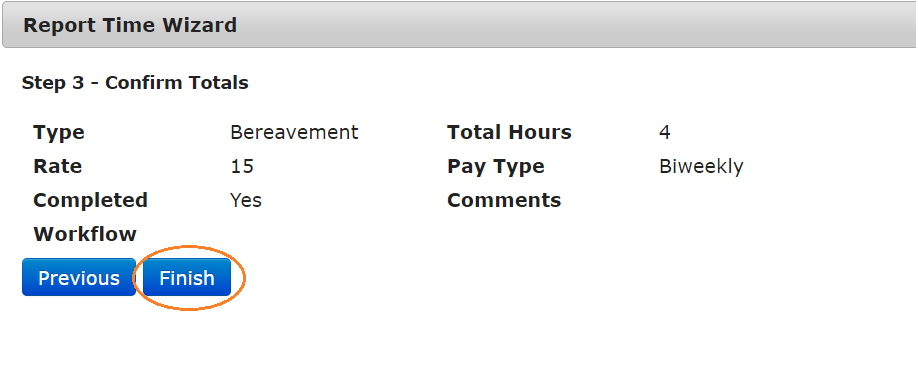
If it looks good to you in the summary part of the Report Time Wizard, click Finish.
Whether you use the Report Time Wizard or just edit/add to the timesheet inline, be sure to click the Save button.
Viewing Reports
There are also, in the Time Reporting window various reports you can run. Click on the name of the report to run it.
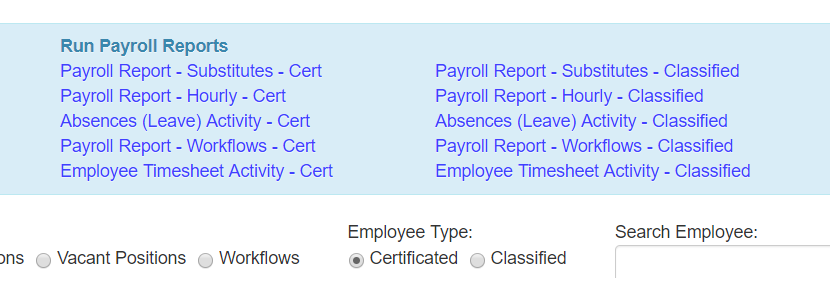
Just for this example, we'll look at what the Payroll Report - Substitutes - Cert report looks like. When you run the report, a new browser window will open up, and you may have to wait a few seconds for the data to load.
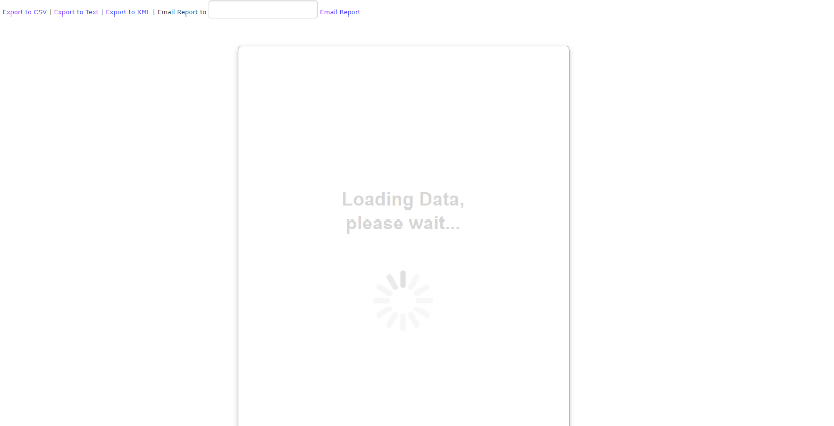
Once the data has loaded, you'll see the report. You can Export to CSV. Or, if you click the floppy disk save button, you can export to Excel, PDF, or Word. You can also click the printer icon to create a printer-friendly PDF version of the report.
