
Onboarding Designer - Tips and Tricks
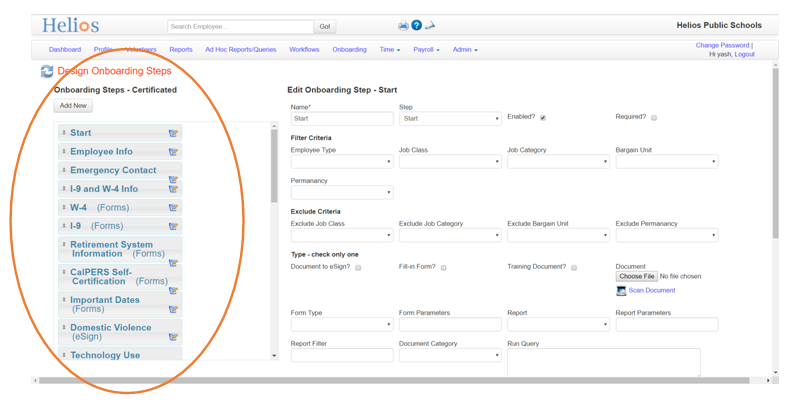
1. In the Onboarding Wizard Steps, follow this order for the onboarding steps. The option to choose in the Step dropdown is in parentheses.
- Start (Start)
- Employee Info (EmpInfo)
- Emergency Contact (Emergency)
- I-9 and W-4 Info (I9)
- Forms (Forms)
- eSign Documents (eSign)
- Document Upload (UploadDocuments)
- Finish (Finish)
2. In the Onboarding Wizard Steps, keep the Forms together and eSign documents together. In other words, do not have a form then an eSign document and then another form as that will throw the order off and also confuse the employee.
3. For Forms, ensure you select an option from the Form Type dropdown to select what form will be used for that step. This will be a form that is pre-built or that you have designed in the Form Designer. If you just want a pdf document read and acknowledged by the employee then you can make it eSign instead and just upload a document.
4. For eSign, browse and upload a document in the Document field, which the employee will sign and accept. If the eSign document needs to have fillable fields such as their name, date, or signature field then you will need to design it as a form in Form Designer and then choose the Form step.
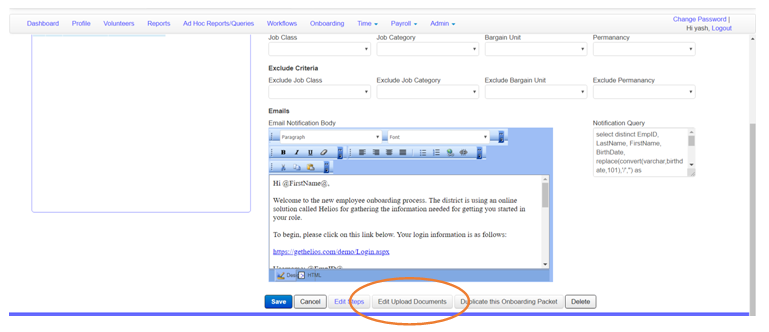
5. Upload Documents will be just one step - the names and categories of the documents you want the employee to upload should be listed in the Edit Upload Documents page.
If you need to update forms in future for newer versions, you can duplicate the form in Form Designer and create a new version of the form. If you update the form, it will change all the forms that past and existing employees have completed. If the forms needs to be updated in place due to an error etc., then of course it can be edited so that the change will take effect immediately in all of the past and existing forms.