
Ad Hoc Reporting
Contents
Using the Ad Hoc Reporting functionality in Helios, you can create reports instantly to meet your needs, or requests from your Board, Superintendent, or others. These reports can be saved to be run at any time with updated data.
Creating an Ad Hoc Report
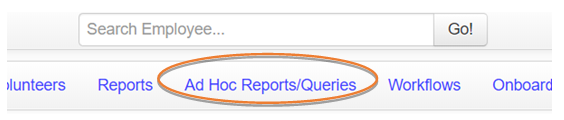
Select Ad Hoc Reports/Queries from the top navigation bar within Helios.
Selecting Fields

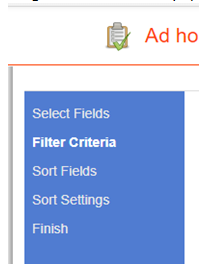
The Ad Hoc reporting tool will display. This is where you start to build your report. Notice, on the left, the steps to build a report. In the middle, there is a list of all fields that can be reported on. And on the right, a(n initially empty) box that shows any fields you've added.
To begin building your report, select the fields you want to report on (i.e., the fields you want to have show up in your report). You can scroll through the fields and select what you want, or you can quickly type, in Search, the beginning of a field (examples here are Name, Current Credential, and Age) and be taken to the appropriate area. To know what fields are used for storing data, see the Ad Hoc Report Fields documentation.
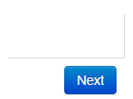
To get to the next step (Filter Criteria) you can click the Next button in the bottom-right corner…
… or you can just click Filter Criteria on the left side menu.
Choosing filtering criteria
There are three steps in the Filter Criteria process. Each step will be explained below. You do not need to select filter criteria, but it will often help get you the actual data you are looking for.
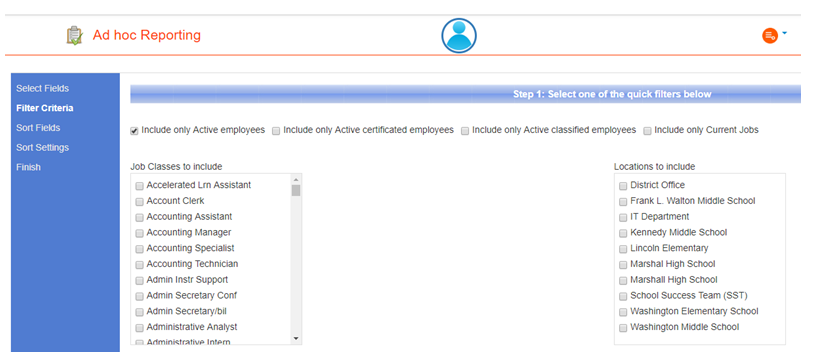
The first step in filter criteria you will see is a selection of "quick" filters. These are broad filters you can use to extract the data you need. In our example, we are selecting only active employees. Since we have not selected specific job classes or locations, we will get all job classes and locations. If you need to refine your data, select one of these other filters. Note: you can select more than one filter in this first step.
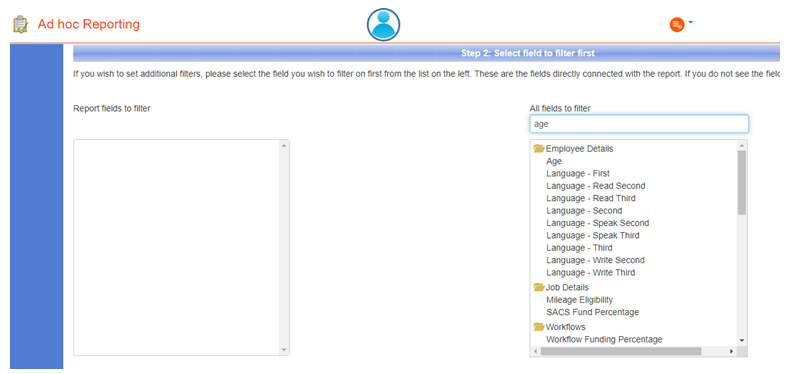
The second step allows you to add additional field filtering criteria to your report. You will notice Report fields to filter is blank-this is because you are building your own report. This will show data only if you are using a Helios pre-built report. If you select an additional field, it will appear in step three of filtering. We have selected age for this example.
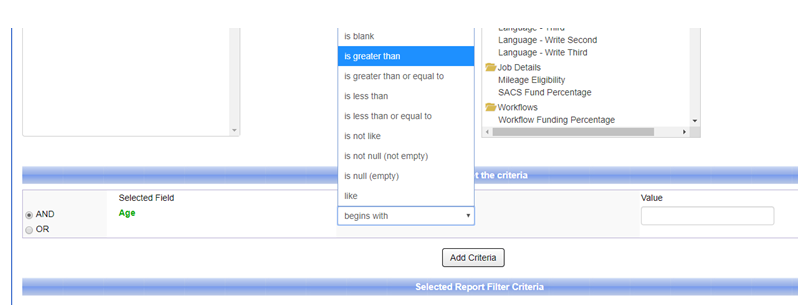
Step three of filtering is where you will see all the fields you have selected from step two. For each field selected in step two, you must select filtering criteria. The drop-down provides a list of function options. Since we have selected Age, you will see that it appears in the step three section.

For the selected field, in this example, we choseis greater than and entered 30 into the Value field. Once you press Add Criteria, it will appear below Selected Report Filter Criteria. Repeat this process for as many fields you want to filter on.

Should you want to remove criteria in step three, press the red ("do not enter") circle to the left of the criteria.
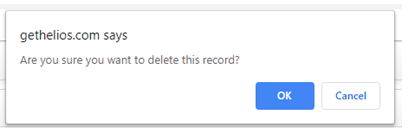
When you try to remove filter criteria, you will be prompted to confirm removal. To remove, press OK. To cancel removing the criteria, press Cancel.
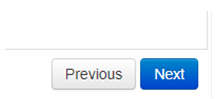
Press Next if you are done with filters. You may press Previous to go back to the previous step.
Selecting sorting fields and settings

The next step is determining how you want your data sorted. You can sort on one or more fields. Check the checkbox next to a field to add it to the sort order. You can also remove fields from the sort order by clicking the red ("do not enter") circle icon next to the field to the right of the field.
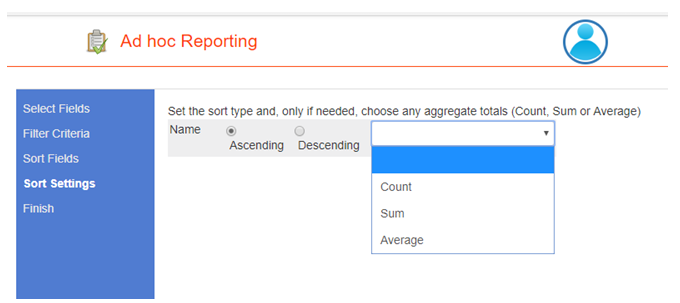
Select the sort settings-ascending or descending. You can also do calculations by using the drop-down menu.

Press Next to continue.
Finishing Ad hoc reporting creation
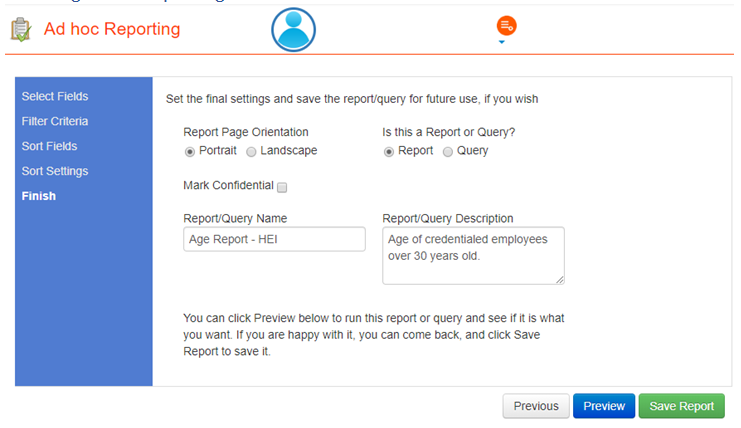
The Finish step allows you to run preview and/or save your report. There are a number of things to note here:
• Since you are creating a report, leave the Report radio button selected. If you want to run a query, see Ad Hoc Query documentation.
• You can select page orientation (Portrait/ Landscape) or make it confidential.
• Enter the name of the report and a description.
• Click Preview to do a test of your report to ensure it is what you want.
• When the test run looks good, click Save Report to save it.
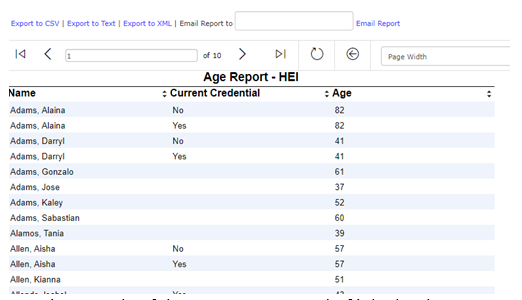
Here is a sample of the report we created. If it looks okay, you may close the window and go back to the "Finish" step to save it.
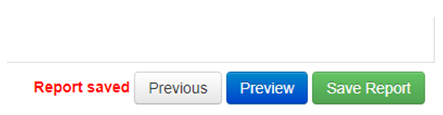
To save your report for future use, click Save Report. Note: if you need to modify this report before saving it, simply select from the left column the step you need to go back to, and make your changes.
Viewing a saved report
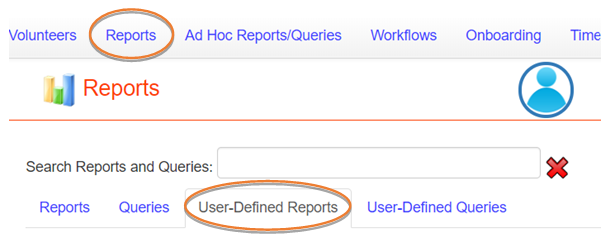
To find your saved report, select Reports from the top navigation bar, and then select User-Defined Reports.

As you can see, our age report is saved under User-Defined Reports. You can delete the report by pressing the red ("do not enter") circle button. You can also filter on this report using the purple filter icon.